Do you want more people to share your valuable content?
Are you looking for a promotion tool that allows you to balance automation and authenticity?
I recently discovered an easy-to-use sharing tool that can help you do exactly that. Viral Content Bee is a free platform for social media sharing. It helps you get more shares for your high quality content by putting it in front of niche influencers who love sharing great content.
In this article you’ll discover how to use Viral Content Bee to promote your content across channels in one place while embracing the human touch. But before we jump in realize there are so many content promotion strategies and tools out there. Keep searching and tinkering until you find what works for you and your niche.
Let’s dive in.
Weigh the quality of your content first
Before you dive into the steps of how to promote your content, you’ve got to ask yourself a crucial question first:
Is your content share-worthy? That’s the key to it all. Quality content increases the odds of getting shares. To enhance your prospects of seeing results, undo the knots in your content. Ask yourself the following questions:
Does your content solve a real nagging problem?
Is it gobbledygook–free, engaging, and lively?
Is the headline clear, specific, and gripping?
Does it have a captivating header image?
And, finally, the big one: is it incredibly useful?
Let me be frank with you: people won’t share lousy content. No app, hack, or platform can outsmart quality. Platform rules state clearly that crummy content will be rejected. Their extensive quality guidelines emphasize quality over quantity.
When you’re ready with a quality piece, it’s time to promote it.
Step #1: Register and enable your social media accounts
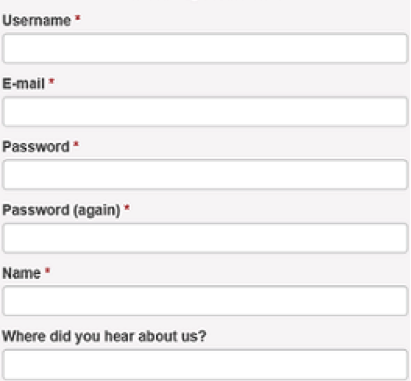
First, go to www.viralcontentbee.com and register for free. You can register through your Twitter or Facebook account or fill in a form.
Source
Once you’re registered, the link in your confirmation email takes you to the platform’s dashboard. Next, activate your social media accounts by going to the settings tab and clicking on social accounts.
Source
The platform supports Facebook, Twitter, Pinterest, Stumbleupon, and Google+. You can use up to five Twitter accounts.
Each time you share another user’s content, you get credits. Note that you don’t get any credits for sharing content on Google+. More about credits and how they work in a bit.
Step #2: Upload the article you want to share
Once you’ve verified your account, you’re ready to move to the next step – uploading your content. Users are encouraged to be very selective so only submit your best content that has a real chance of doing well. To upload your content you need four items:
#1. The title of the article- make sure it’s clear, catchy, or piques the readers curiosity so they check it out.
#2. The image URL of the piece- remember to brand your image to boost your brand recognition.
#3. A short description of the post- your description should act as a sales letter of your blog article so readers ‘buy’ it by sharing it.
#4. And of course, the URL of the article.
Here’s a shot with the required fields already filled in.
Source
A nifty feature you should consider activating when uploading your content is the retweet function. It lets you get notifications when someone shares your post and boosts your clout score.
Source
The platform allows you to customize your dashboard and precisely target your audience by choosing your three favourite categories. This lets you only see the types of content you want to share instead of being clogged with irrelevant content.
Source
Upon registration, you get 10 free credits. That’s enough for you to upload one article. When done, wait for approval. Approval may take several hours since it’s done by a real human to ensure that only quality content gets the nod.
Don’t worry about the queue. Once your content has been okayed several times, you’ll bypass the moderation waiting line since you’ll now be a trusted user.
Step #3: Share other people’s content
Sharing other people’s content is authentic and a breeze.
Each article has a title, a description, and sharing buttons underneath. You can take a peek at a piece and share it through your favourite channels if you like it. No bots share content on this program. It’s real people who’re impressed by your awesome content.
Source
As you can see from the screenshot above, you can read a brief description of the piece to get an idea what it’s about: if your content appetite is whetted you then click on the title and skim through the article – and if you like it, you just need to click on the social media icons to share it.
The more you share the more credits you get to promote your own content. Credits are allocated on a sliding scale according to your audience size.
Source
As you can see from the shot above, the bigger your audience the more credits you get. Note that you need at least 100 Twitter followers and a minimum of 250 Facebook friends to share other users content.
Use the buffer feature to schedule your shares so they come out at the exact intervals you desire. You can also track the number of shares your article is getting in the stats tab. Here’s some numbers I pulled from the system.
Source
The graphic above shows that this particular post of mine seems to be gaining some traction on Twitter. This handy stats feature helps you to see which channel works best for your business so you evaluate your social media strategy and allocate financial and human resources accordingly.
For example:
If you see your content getting some traction on StumbleUpon, you’d give StumbleUpon Paid Discovery a try.
Or if you notice your posts are popular on Twitter, maybe it’s time to evaluate your Twitter marketing strategies.
Maybe you realise your articles doing well on Facebook, so you’d consider investing in Facebook ads.
Perhaps you get more shares on Pinterest, it’d mean you make your content marketing more visual and engage more on that channel.
Whenever you share someone else’s content you get credits while you get debited when your content gets shared.
It’s all about keeping your credits bank full so your articles stay shareable. When your credits are running low you get an email notification so you top up. Each time new posts are added yours gets pushed down to the 2nd, 3rd, 4th page and so forth which means fewer shares for you. To keep your content on the first page you have to add 30 credits.
A cool tip to bump up your piece to page one at regular intervals, especially when it’s new, is to add credits in batches of 30 or so credits. If your post gets shared while you don’t have credits, the share doesn’t go live until you earn some.
If spending time earning credits sounds like a big hassle you can always upgrade to the paid monthly plans. There are two tiers. First, there’s the $19.95 plan that gets you 200 credits every month and the $49.95 plan that nets you 500 credits.
Sharing other people’s content builds your authority: more and more people will regard you as a trusted voice in your niche and be more likely to share your content. Not only that. They’ll probably seek out your services and products as well.
Step #4: Reach out, interact, and network
A standout feature of this tool is that it lets you build real human connections with ease. It seamlessly allows you to kick off a conversation by following the sharer to the channel where the piece was shared.
The system pulls out a sharer’s details and the channel they used to share. This lets you interact with people who share your content by clicking on the interact button under the interactions tab.
Source
Networking is a big part of business. Clicking the highlighted button enables you to instantly follow your promoter on social media, thank them, and grow your network. You can develop genuine relationships with fellow marketers and influencers this way. Here’s how I did that recently:
The interactions tab is an effective way to build connections fast and get more shares by liking, retweeting, thanking, and following those who promote your content.
Used right, this content promotion tool doesn’t only get you shares. It also grows your traffic, builds your brand, and enables you to meet business partners. For me, the greatest benefit of Viral Content Bee is that it fosters real human connections and community.
Summary: Viral Content Bee Walkthrough
Here’s the thing: Getting content noticed is tough.
Many content marketers are frazzled by producing stellar content they know deserves to light up the web only to have it go poof into cyber oblivion – ignored, disregarded, forgotten. That’s the harsh reality. According to a Buzzsumo Content, Shares and Links report, the majority of blog posts receive a paltry 2 or less Twitter shares, 2 or less FB interactions, 1 or less Google+ shares, and zero LinkedIn shares.
Sad, hey?
With this promotion tool, you can pull your content out of the abyss, get discovered by search engines (and people) and create real social buzz.
Join Viral Content Bee now!
The post Viral Content Bee – A Hot Content Promotion Tool appeared first on SEO Chat.
Source: SEO Chat
Link: Viral Content Bee – A Hot Content Promotion Tool

Leave a Reply